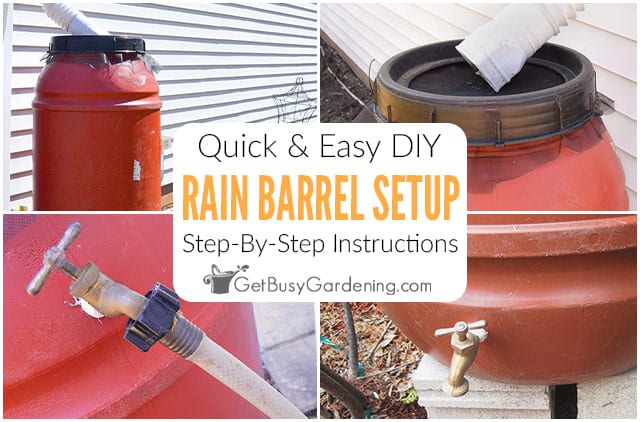
Having a rain barrel is fun, and such a wonderful asset for any gardener, but many newbies are intimidated by the thought of getting it set up.
Installing a rain barrel may seem like a big complex task, but it is actually pretty simple. These steps take less than an hour, and it’ll be ready to use right away.
So, if you’re new to rainwater harvesting, then this tutorial is for you. Follow these simple rain barrel setup instructions, and get yours ready to go today…
WHERE TO INSTALL A RAIN BARREL
Before setting up a rain barrel, you’ll need to decide where to put it. Look at all of the downspouts on your house, shed or garage, before choosing a location.
Here are some things to consider when you’re looking for the perfect place…
- Put it in a spot that is easy to get to, and close to the area where you will need the water the most (like near your garden or potted plants).
- Make sure it is on level ground. Water is really heavy, and if the barrel is not level, it could fall over once it’s full.
- If you’re concerned about the overflow pooling around the foundation of your house, add a downspout attachment that will turn off the flow of water once it’s full. This will allow the excess to run through the gutter like it normally would.
- Use landscaping blocks or bricks to elevate the barrel. This will make it work better (allowing gravity to help with water pressure), and also gives you extra space below the spigot so it’s easier to access.
EASY RAIN BARREL SETUP STEPS
Watch the video above, or read on!
Setting up a rain barrel is easy, and only takes a few minutes. You’ll only need a few tools to get it installed, which you probably already have around the house…
Supplies Needed:
- Rain barrel
- Level
- Ladder
- Flat head screwdriver
- Flexible tubing, or downspout diverter kit
- Screen material (optional)
- Concrete blocks (optional)
- Tamper (optional)
- Hacksaw (optional, if you need to cut the downspout)
After gathering your tools and supplies, follow these easy rain barrel installation steps. The estimated set up time is about 30 minutes, but that can vary depending on your tools and supplies.
Step 1: Remove the downspout – Grab your ladder and the screwdriver, then look for the best spot to detach the downspout.
Find a seam in the gutter that is closest to where the top of the rain barrel will be. Then simply remove the screws from the downspout, and remove it.
Step 2: Level out the ground – Once it’s full, your rain barrel will get very heavy. It’s important to make sure it is as level as possible, so it won’t fall over. First, place it in the spot where it will sit, then use your level to see how off it is.
You may need to dig out or add soil to the spot to level it out. You can use a tamper tool for this, which makes it easier to level out the soil.
Step 3: (optional): Elevate the rain barrel – Consider placing it on top of concrete blocks to raise it off the ground.
Adding blocks underneath makes it easier to use, and also allows gravity to help increase water pressure. You can use cinder blocks to raise it up, or buy a stand for it.
Step 4: Add flexible downspout tubing – This tubing will direct the rainwater from the gutter into the rain barrel.
Secure the flexible tubing onto the gutter using the screws from the original downspout, so it won’t blow away.
You may need to drill or poke holes in the tubing in order to screw it to the gutter. Then you can simply adjust it so it will empty into the opening.

Step 5: Control the overflow – Your rain barrel should have an overflow spout near the top. You don’t want the overflow to empty right next to the house. So I use a cut off piece of an old hose to control where the overflow goes.
Instead, you can buy a downspout diverter attachment. That will turn off the flow once the barrel is full, allowing the excess to run through the gutter like it normally would.
Or you could use a fancier diverter kit to make installing your rain barrel even easier. Use a hacksaw to cut the gutter, and install the rain barrel diverter.
Step 6 (optional): Cover the opening – Some types fill up through the top, which is wide open.
In order to protect the water, and keep bugs (like mosquitoes) and debris out, cover the opening with a piece of window screen.
Simply take a piece of screen material, and cut it to fit over the opening. Then secure it under the lid.
Step 7 (optional): Add a hose to the bottom spigot – In order to make it easier to use the water, attach a hose to the spigot at the bottom as the final step in installing your rain barrel.
I used a cut off piece of an old hose for mine, but you could certainly use a regular sized garden hose, if that’s what you prefer.

HOW TO CONNECT TWO RAIN BARRELS
If you have enough space, you can connect two rain barrels together to collect even more water!
To do that, simply run a hose from the overflow valve on the first one, and direct it to empty into the second. Otherwise, you can use a connector kit to hook them up.
That’s it! Your rain barrel setup is complete, and you are ready to start using it right away! Installing a rain barrel of your own is really simple, and doesn’t take much time. So, what are you waiting for?
Source:
Andrychowicz, A. How to Set up a Rain Barrel Step-by-Step.
Retrieved June 18, 2021 from https://getbusygardening.com/how-to-set-up-a-rain-barrel
